Final parts list for very first AR build

Collapse
X
 
  • Filter
  • Time
  • Show
Clear All
new posts
  • Flight Medic
    Bloodstained
    • Sep 2019
    • 55

    Final parts list for very first AR build

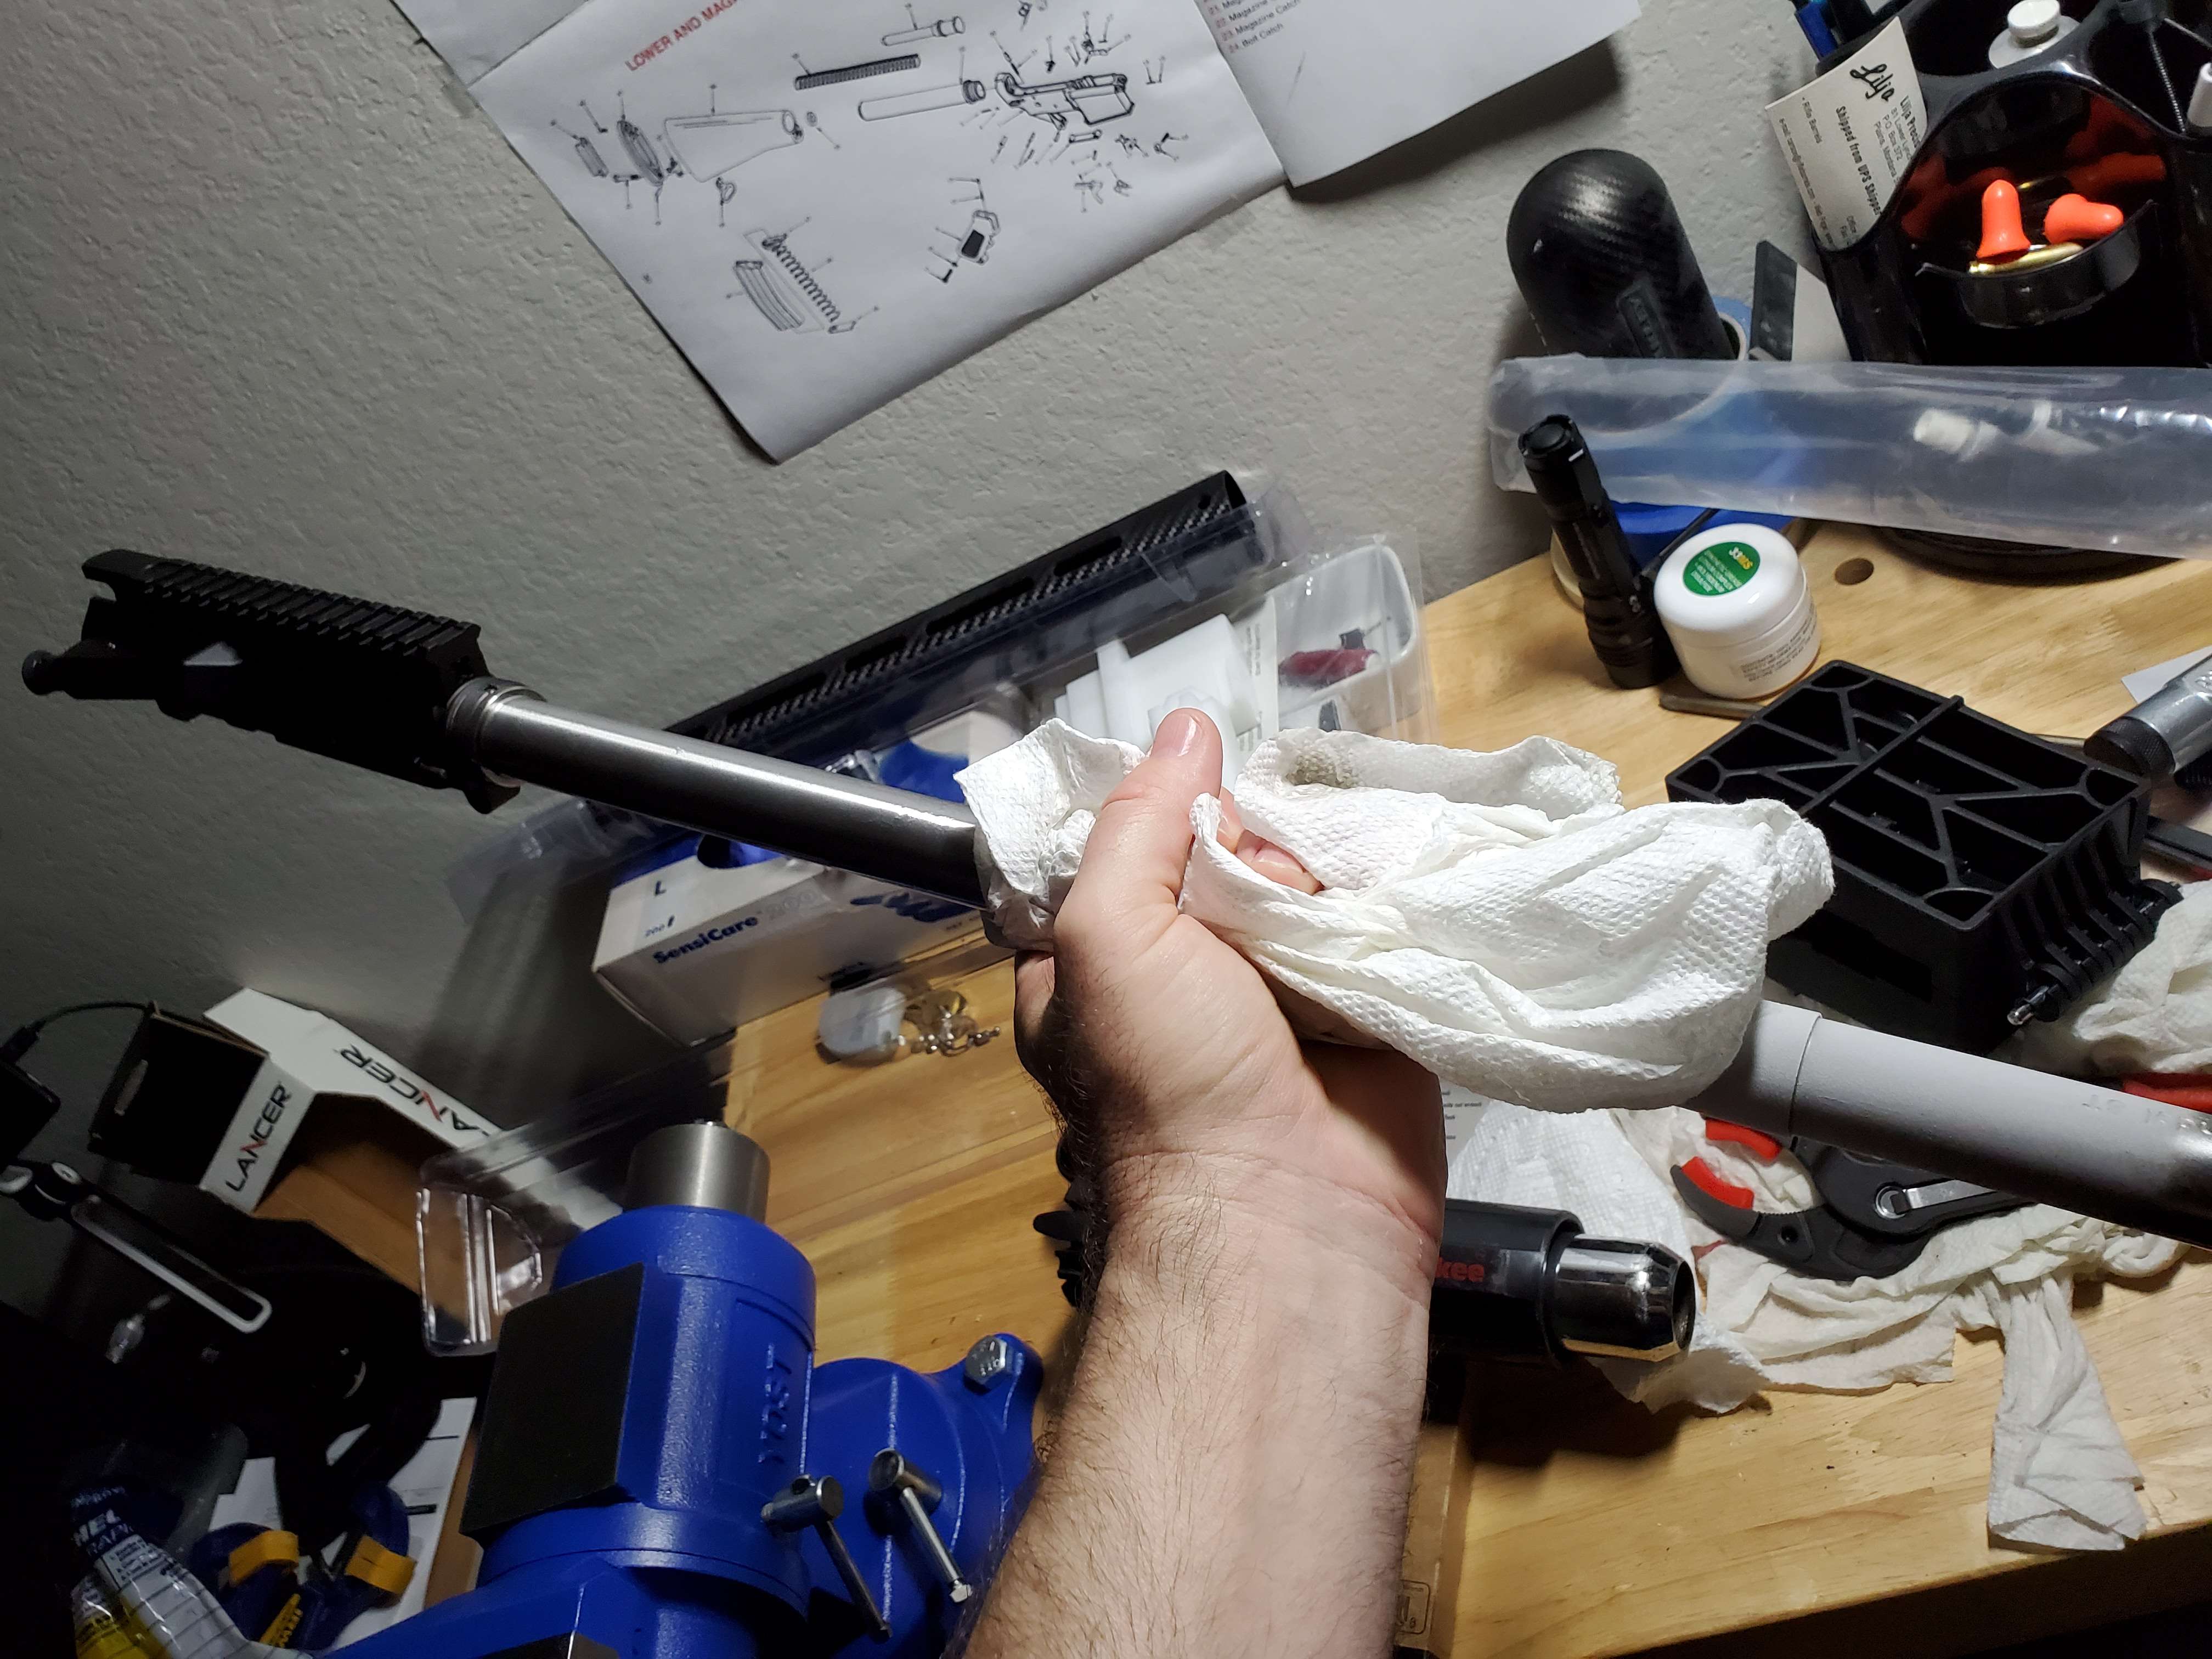
    Here what I've amassed so far...I believe its everything I need except for BUIS (which I'm still on the fence about if I really need).


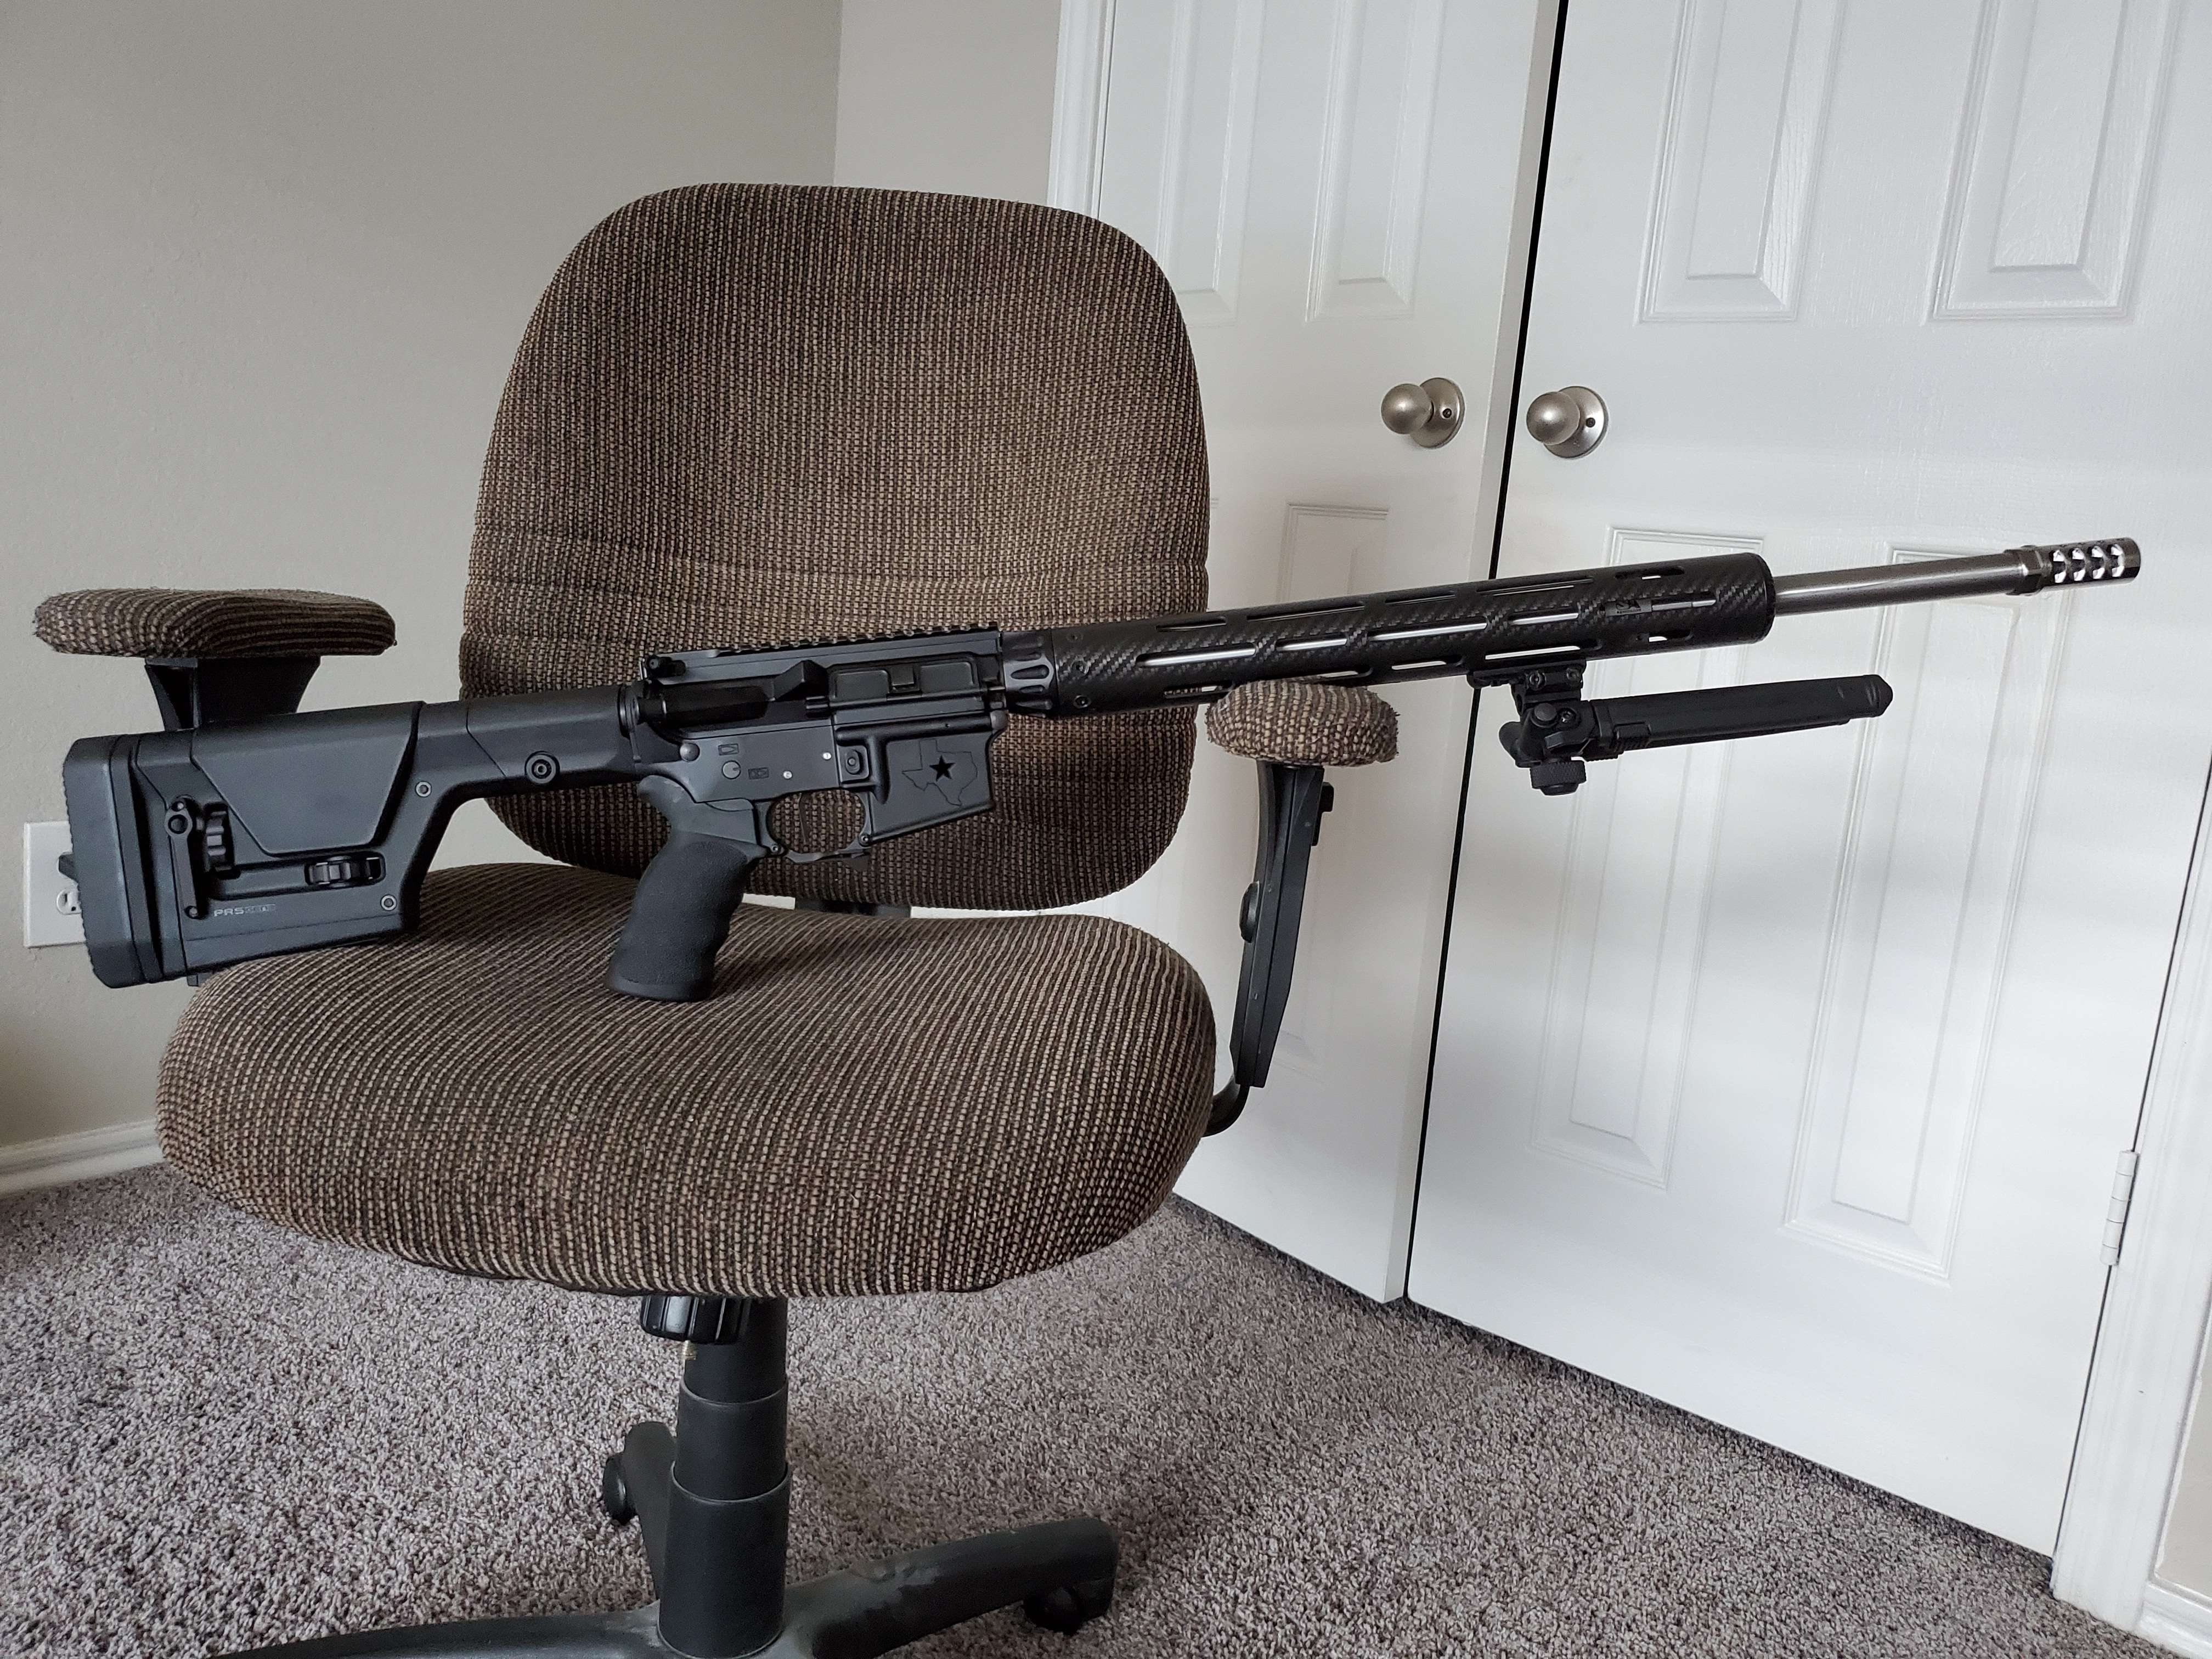
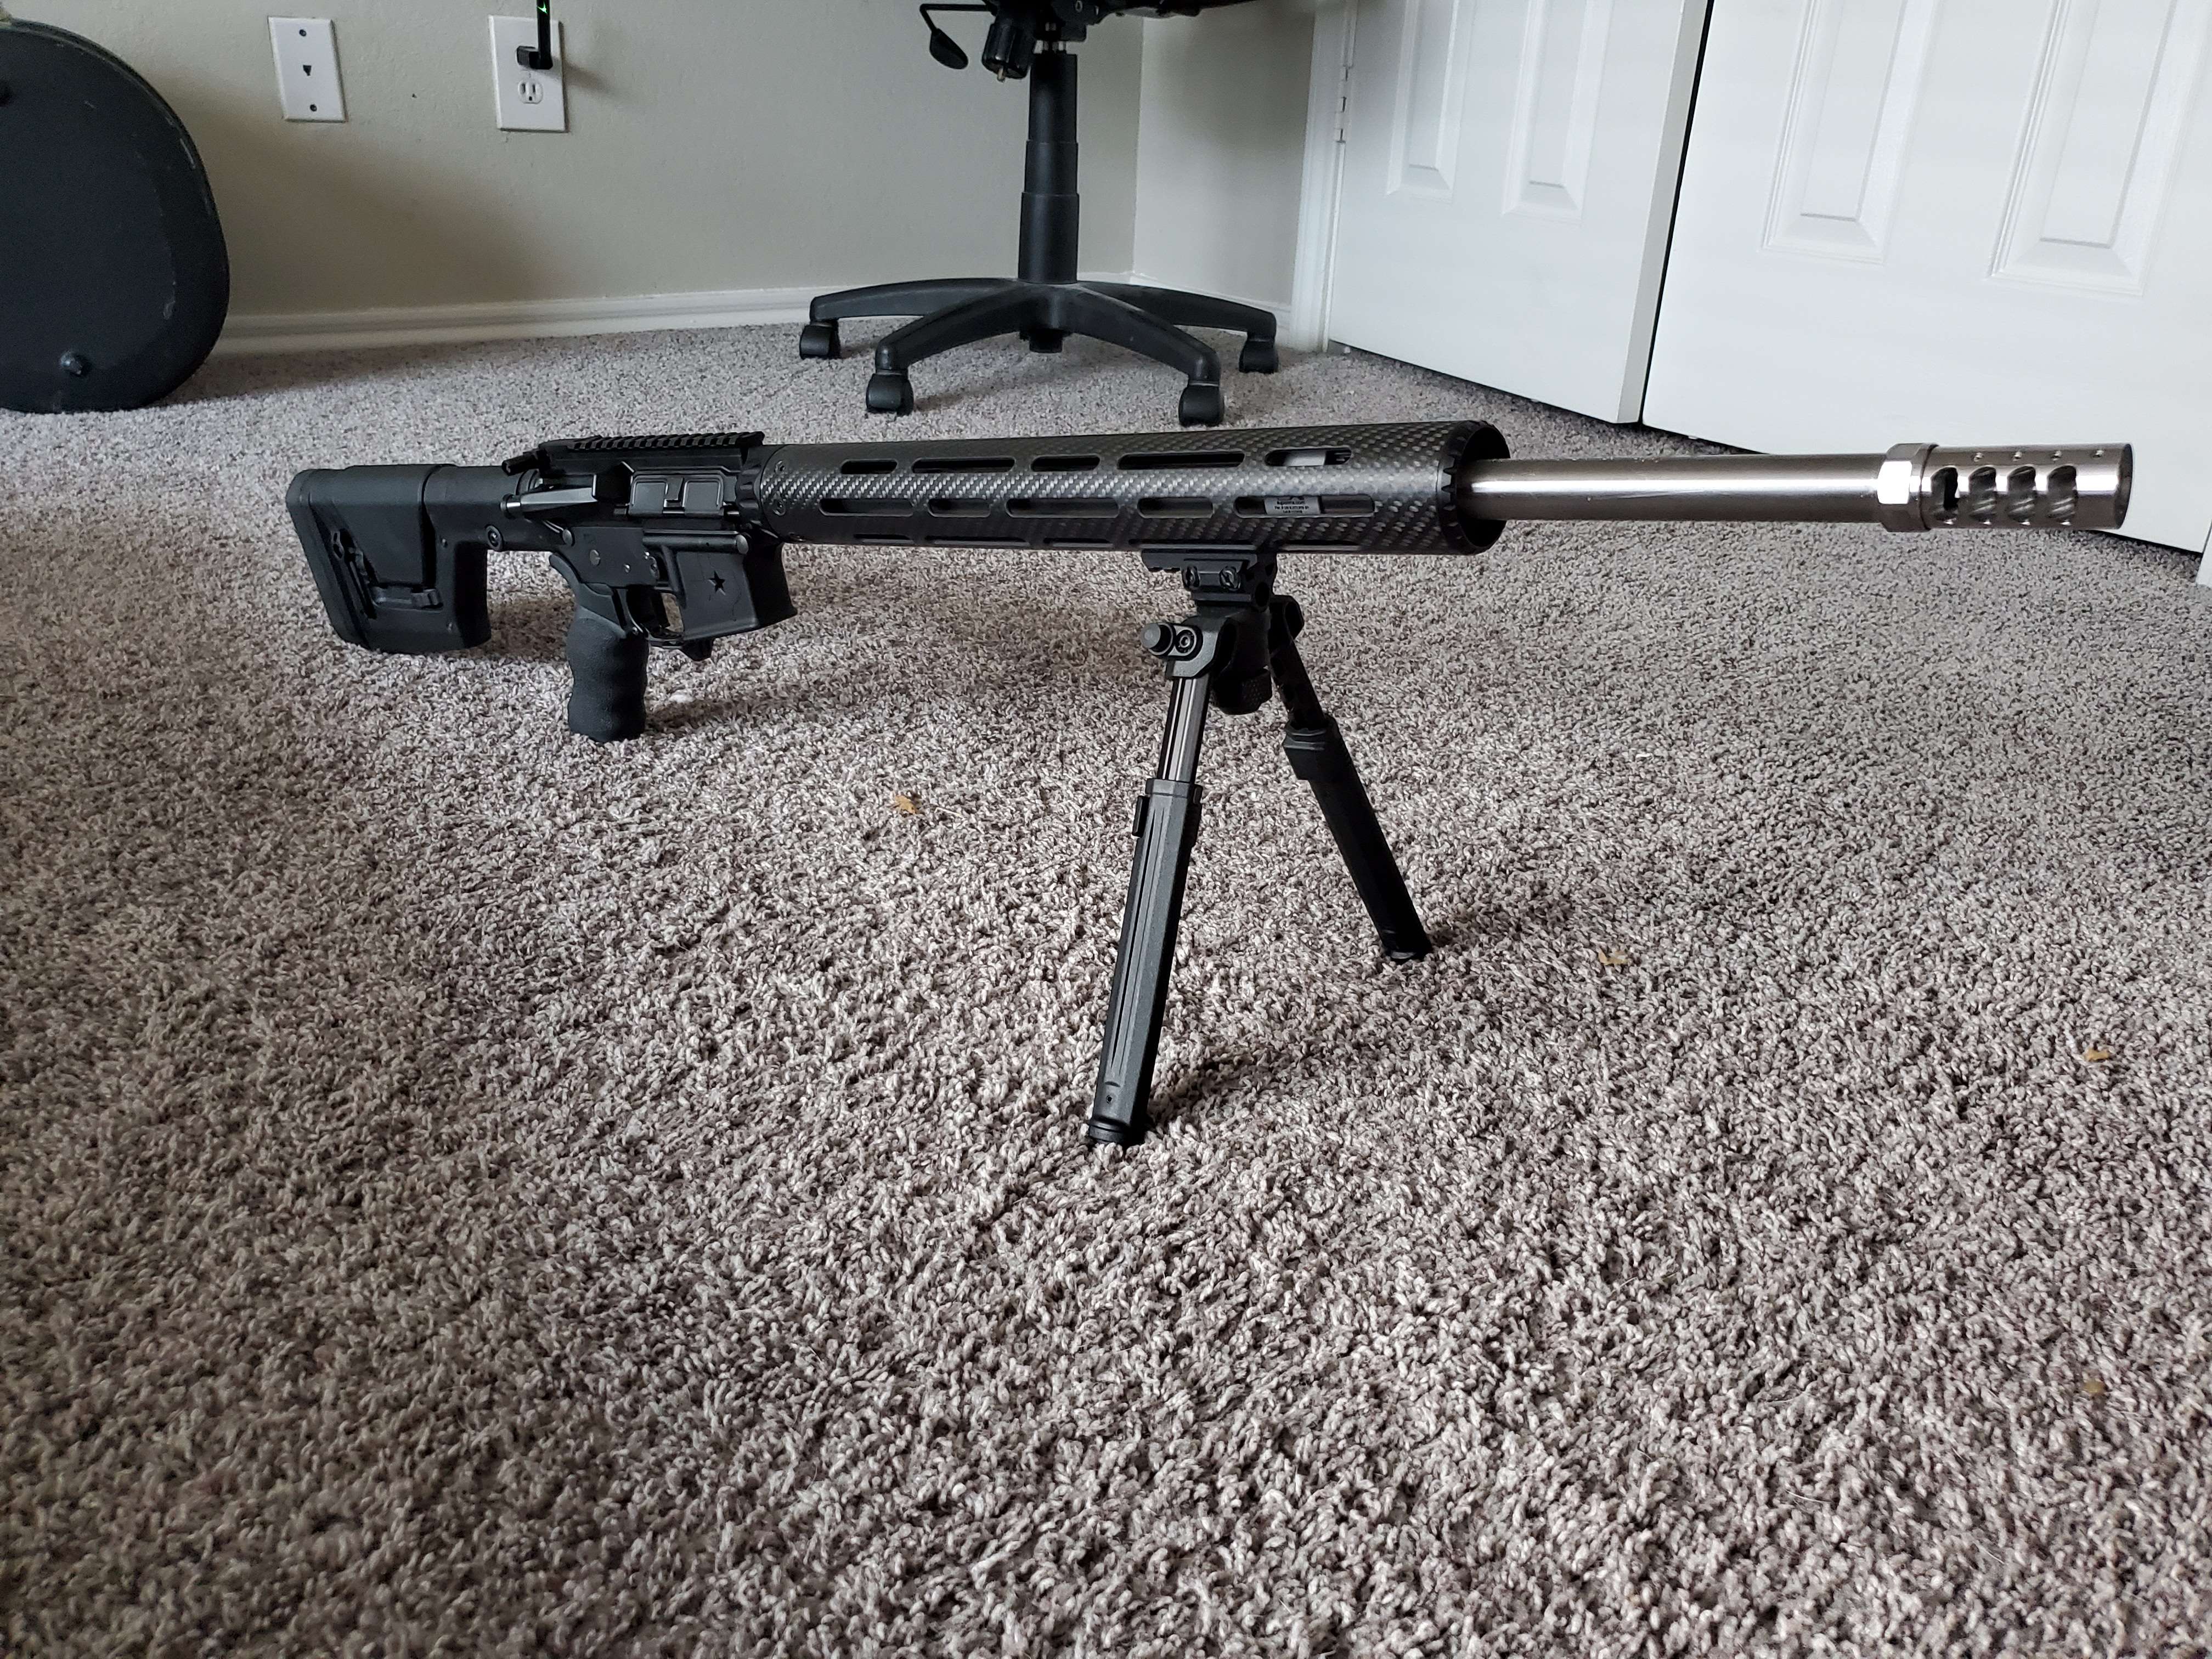
    • Aero Precision M4E1 Stripped Upper Receiver + Upper Parts Kit
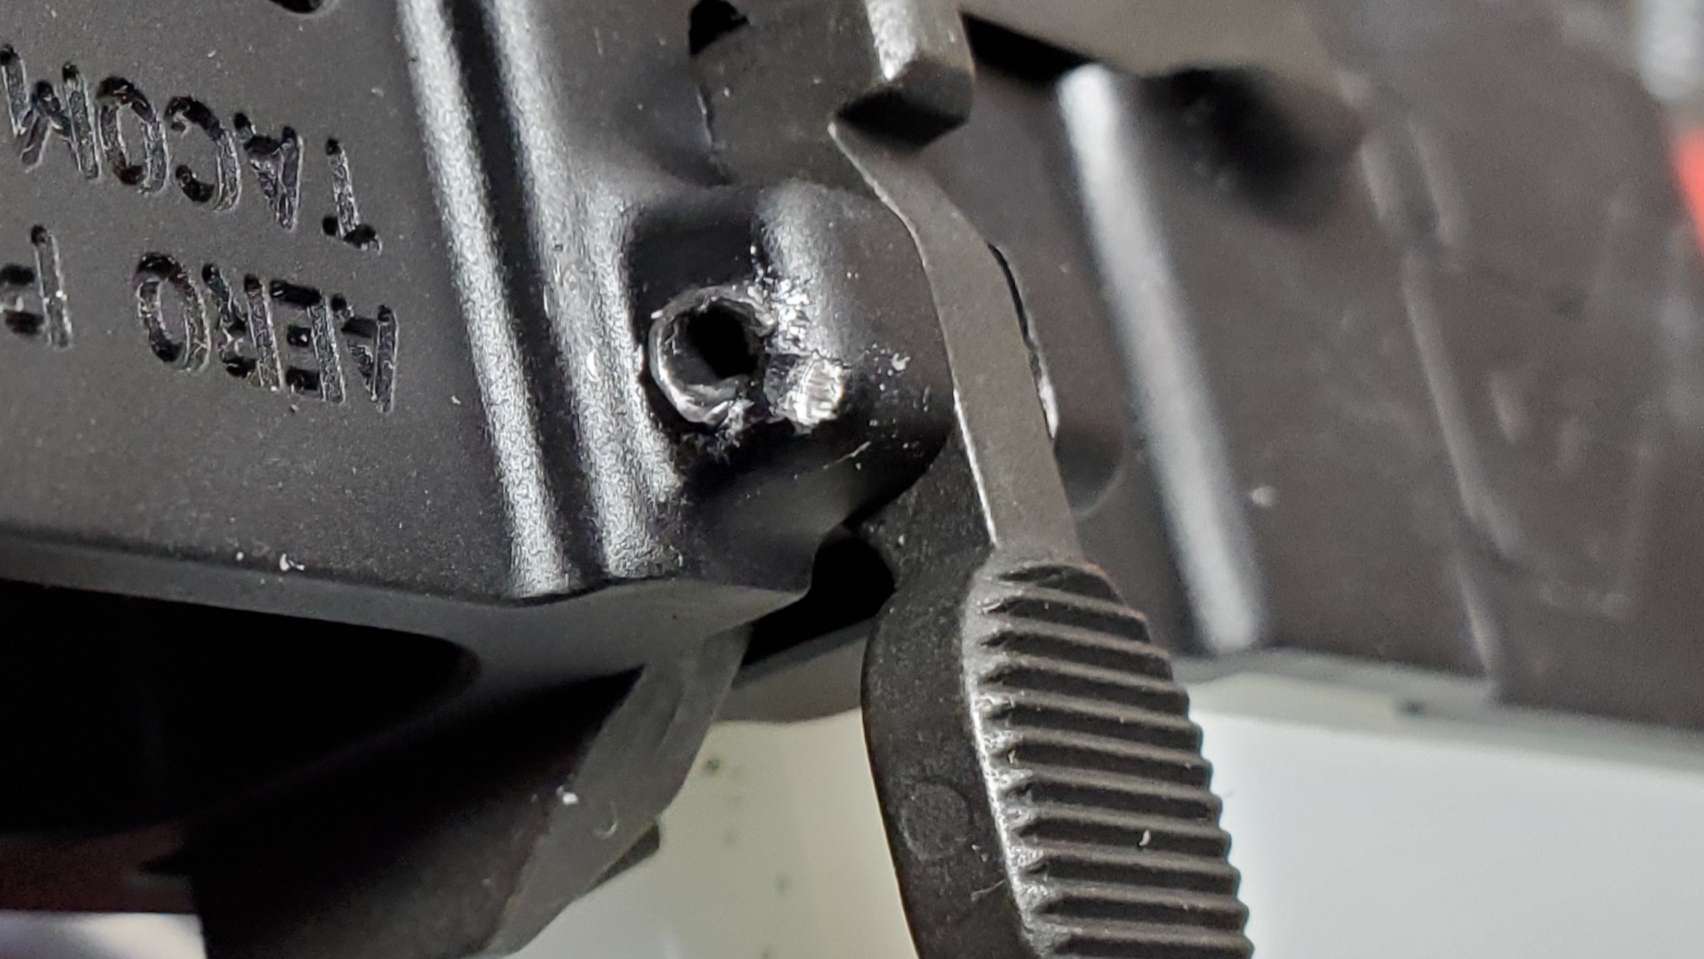
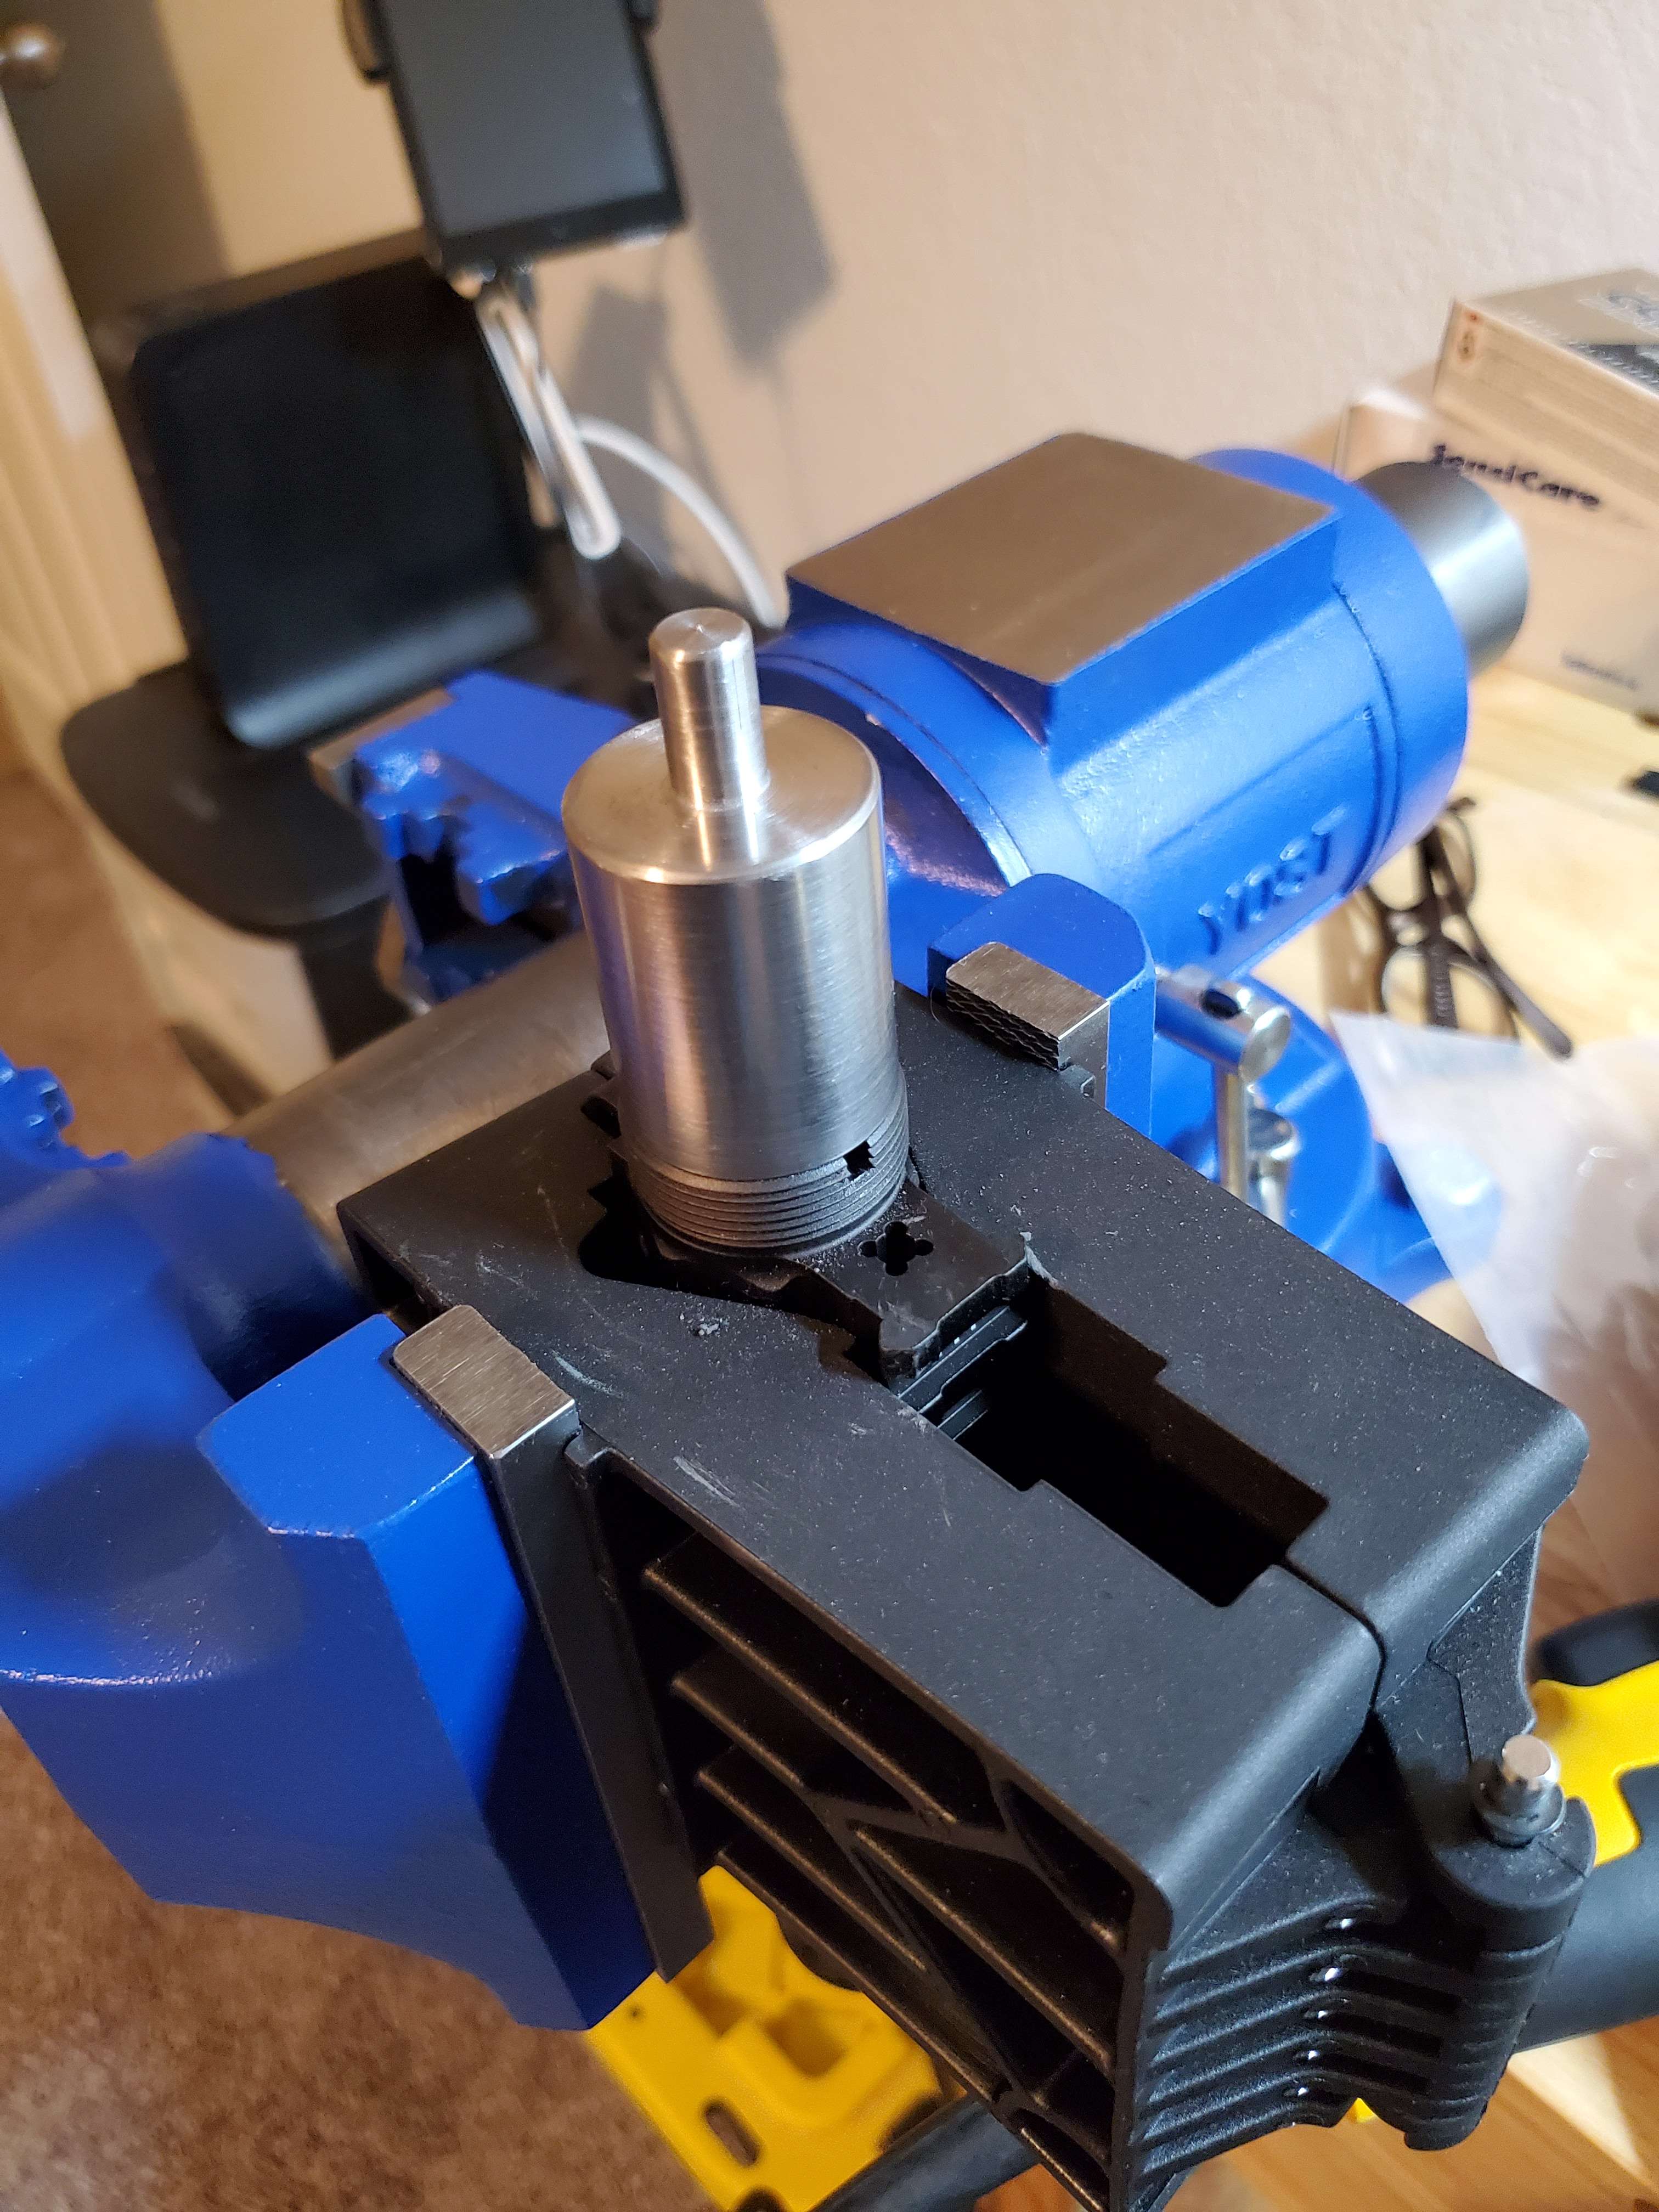
    • Aero Precision Gen 2 Stripped Lower Receiver + Geissele Lower Parts Kit
    • Lilja AR24 23" 6.5G HBAR barrel
    • APA Fat Bastard Gen-2 Self Timing Muzzle Brake
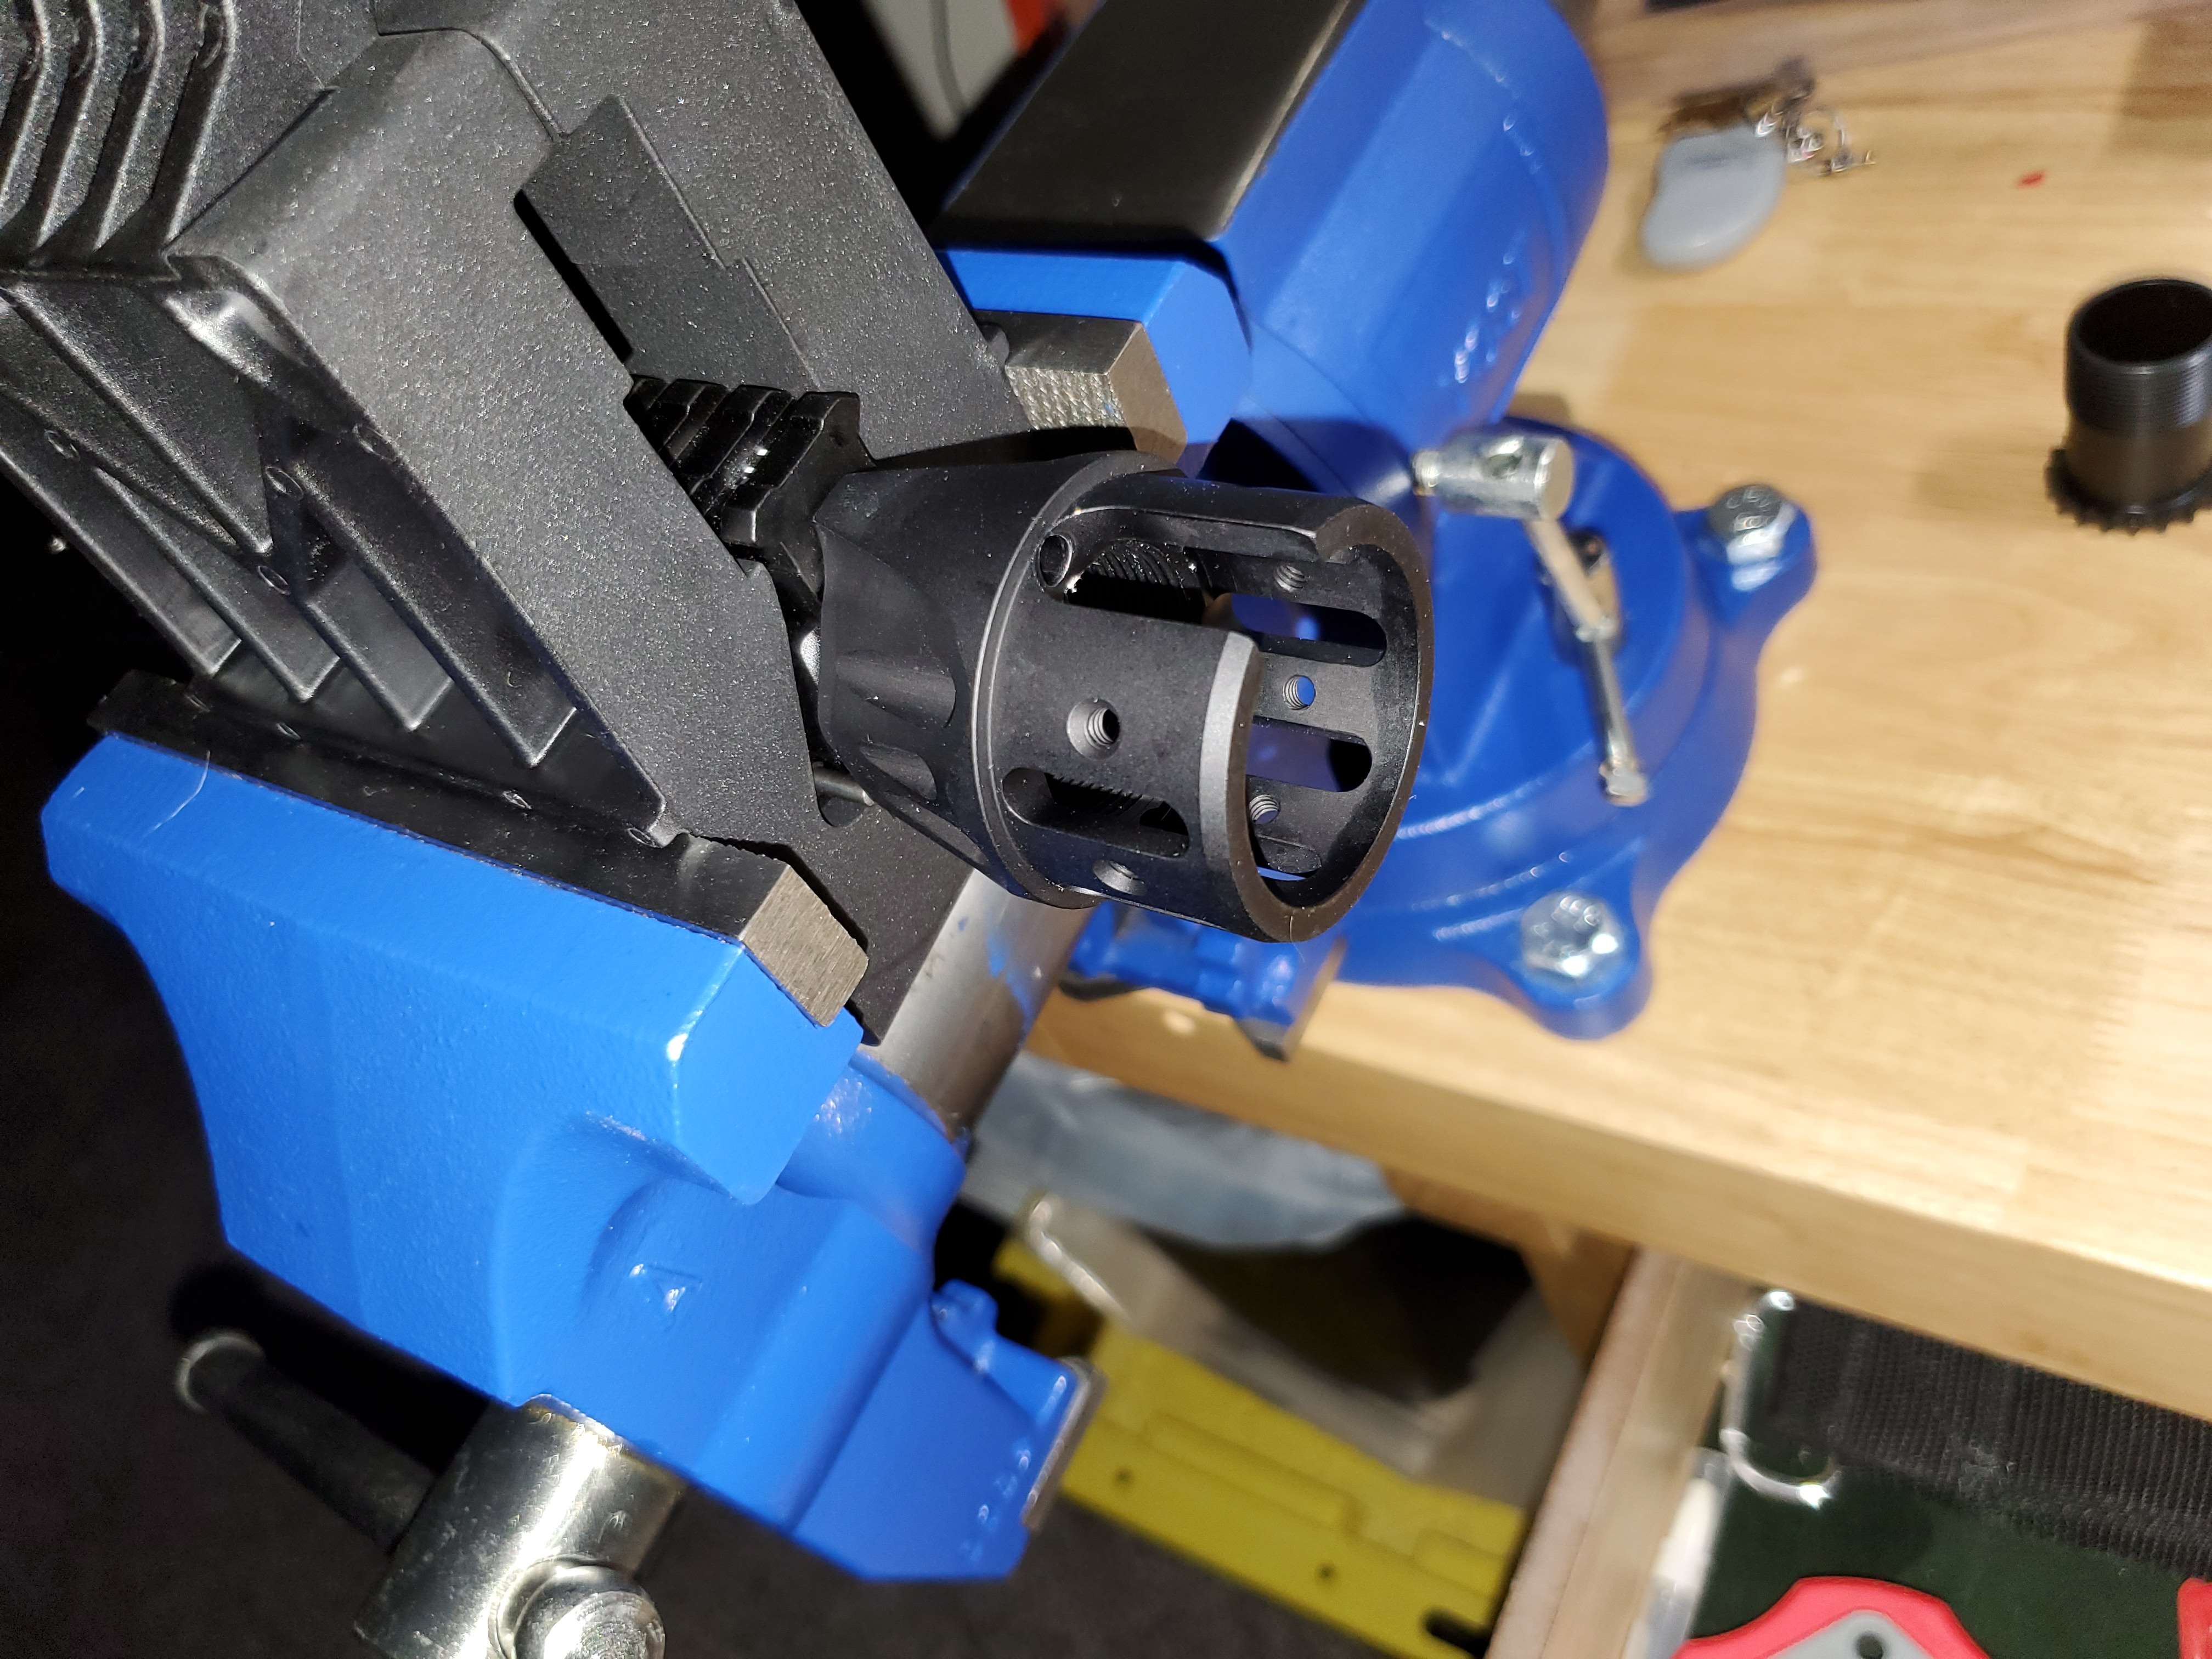
    • Superlative Arms .936 Adjustable Gas Block
    • Aero Precision Stainless Rifle-Length Gas Tube
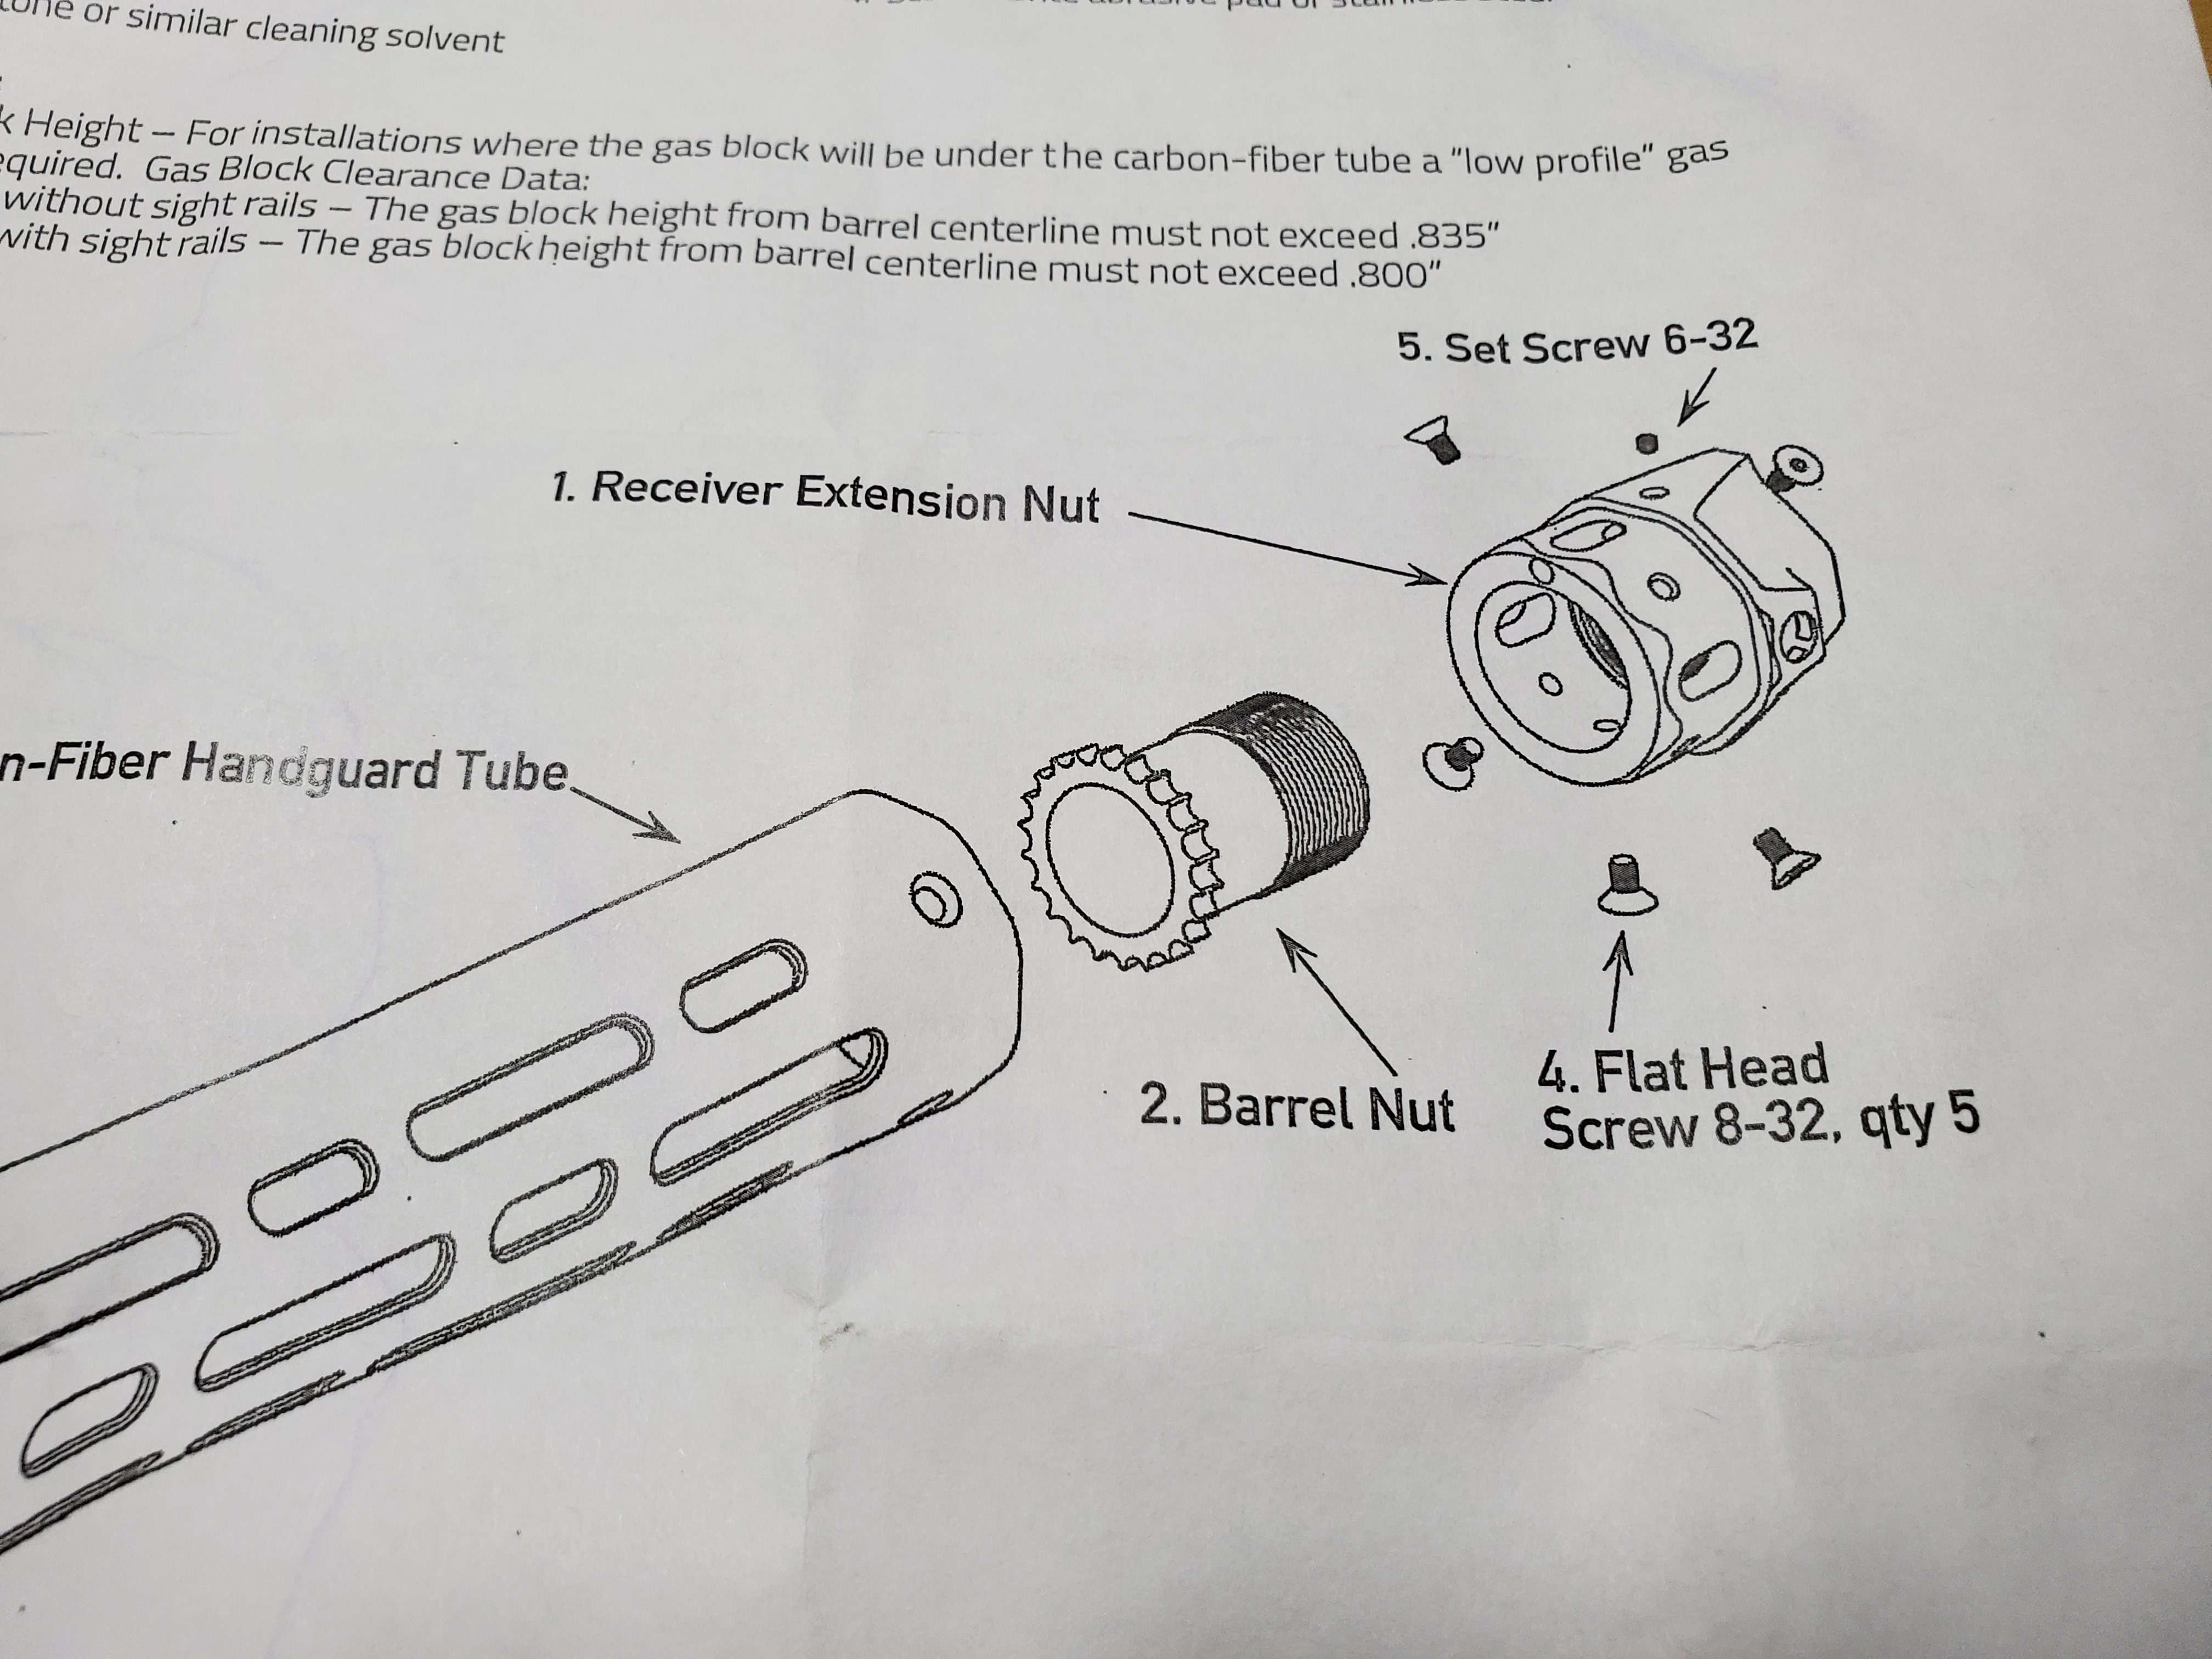
    • Lancer LCR5 16.25" Carbon Fiber Handguard
    • Magpul Bipod
    • Maxim Firearms 6.5 Bolt (matched & headspaced by Lilja)
    • AAC (Toolcraft) Nickel Boron Bolt Carrier
    • TriggerTech Adaptable AR Primary Trigger
    • Strike Industries Cobra billet aluminum trigger guard
    • Rainier Avalanche Mod2 Charging Handle
    • Aero Precision AR15 A2 Rifle Buffer Kit
    • Magpul PRS GEN3 Stock
    • Ergo Tactical Deluxe Grip
    • Vortex Razor HD II 4.5-27x56 Rifle Scope
    • Geissele Super Precision 34mm AR Scope Mount


    Thanks to Vortex's generous 40% discount for First Responders, even with the tools I needed to buy (bench vise, blocks, punches, torque wrench, armorers wrench, Reaction Rod) plus four E-Lander magazines and a Pelican 1750 to tote this thing around, I was able to stay under $5000. Now the fun part...I get to put it all together


    Comments welcome.
    Last edited by Flight Medic; 12-07-2019, 10:50 AM. Reason: TYPO
  • Growler
    Warrior
    • Jan 2019
    • 163

    #2
    I was gonna say, build a cheap beater blaster first for practice, but...

    Pics and a build play-by-play would be nice.

    Comment

    • Flight Medic
      Bloodstained
      • Sep 2019
      • 55

      #3
      Originally posted by Growler View Post
      I was gonna say, build a cheap beater blaster first for practice, but...

      Pics and a build play-by-play would be nice.
      OK. Just waiting for the some of the necessary tools to be delivered from Brownells and MidwayUSA. Also, I was told I need at least one magazine to test the lower assembly function, so waiting on those as well.

      Comment

      • Flight Medic
        Bloodstained
        • Sep 2019
        • 55

        #4
        OK, so I got the rifle put together, but I had a few hiccups along the way. First was the roll pin for the bolt catch. I destroyed the first one by hammering too hard and also dinged my lower when the punch slipped.


        OOPS!!

        Second attempt went MUCH smoother as I used a piece of coat hanger wire to line up the catch holes from the opposite side while I tapped the pin in.

        With the lower done I started on the upper by lapping the face.


        I managed to assemble the upper without damage...once I figured out which spring was which in the upper parts kit.
        The toughest part was the barrel. It would not go into the upper receiver by hand. I could not get it in further than 1/8" before it wouldnt budge.


        Curt (Six Sigma) recommended I freeze the barrel first, then use my heat gun on the upper just before inserting the barrel. ..so I put the Lilja in the deep freeze overnight.

        Last edited by Flight Medic; 10-22-2021, 12:46 AM.

        Comment

        • Flight Medic
          Bloodstained
          • Sep 2019
          • 55

          #5
          The Lancer LCR5 Handguard installation instructions called for their "Receiver Extension Nut" to be installed with Red-Loctite BEFORE installation of the barrel (the barrel nut essentially becomes a jam nut).


          I completed this step and, while I was wondering if I could still heat the receiver with the red Loctite on the threads, a panic fell over me because I realized that, with the Lancer Receiver Extension Nut in place, I will NOT be able to visualize the index pin going into the recess in the upper receiver.


          I figured this is not a issue for most people that have a barrel that slides right in at room temperature, but without being able to view the pin's orientation to the recess I would have ZERO confidence tapping/pressing the barrel into position. I thought about marking the barrel somehow with a line or dot that coincides with the pin location to make sure the barrel doesn't rotate. However, Sharpie ink is going to adhere to a frozen barrel, nor will masking tape. And while I'm pondering how exactly I'm going to accomplish this the red Loctite is drying. So, in full desperation, I decide to remove the nut. I tried by hand to remove, but it wouldn't budge. I had to use a large screwdriver, inserting it transversely through the slots, and use both hands to twist like a die handle wrench to force it off. It took some muscle, but once I got it spun one complete revolution it came off with nary a whimper


          I cleaned out all the dry (and still wet) Loctite, heated the receiver threads with my heat gun and used some Rem Oil to lube the inside of the receiver collar. I grabbed the barrel out of the freezer and began to insert. It went in farther this time (about half way), but as soon as I heard the "hiss" from the cold barrel extension meeting the hot receiver the barrel just froze in place. My heart sank when I noticed the pin was slightly off center from the recess slot and the barrel wouldn't turn at all. I attempted to use my Knipex pliers, but the rubber jaws simply spun on the frozen barrel. I immediately grabbed my bench mat and, with the rubber-side to the barrel, began attempting to pull and twist the barrel out. I was seeing slight movement outward, so I persisted until the barrel was completely removed.


          Making sure the pin was lined up this time, I reinserted the barrel as far as it would go by hand. Then I removed the semi-mated pair from the vise,


          placed the barrel vertically (thread-side down) on my wooden bench with the factory rubber cap over the barrel threads and began to firmly tap the back of the receiver with short strokes. The receiver slowly slid down the barrel extension and mated flush with the receiver flange. I did NOT have to strike nearly as hard as I feared. I then reapplied red Loctite to the Lancer Receiver Extension Nut threads (rather than the receiver threads), re-mounted the Receiver Extension Nut and let it sit for the recommended 24 hours.


          (you can clearly see on the right side of the U-shaped cutout where the screwdriver dinged-up the aluminum from the force needed to break the half-dried Loctite. This needed shaving later on in order to slide the carbon fiber tube in place.)


          `
          Last edited by Flight Medic; 10-21-2019, 10:00 PM.

          Comment

          • Flight Medic
            Bloodstained
            • Sep 2019
            • 55

            #6
            While installing the SA clamp-on gas block I had to run up to AutoZone and purchase a feeler gauge set because the instructions called for a .025 gap to line up the holes.


            The rest of the stuff was pretty straightforward. The only other issue I had was with the Lancer picatinny rail section.


            I wanted to use the forward-most slot for the rail for the bipod, but it came into contact with the bottom of the gas block, so I had to move the rail back one slot...although I dont think it looks too weird set further back.


            So, theres growler's requested "play-by-play" and a pic of the finished product. Once I test-fire it, and make sure it doesnt blow-up, I will mount the optic and see if Ive achieved my goal of a precision AR build.
            Last edited by Flight Medic; 10-21-2019, 01:34 PM.

            Comment

            • A5BLASTER
              Chieftain
              • Mar 2015
              • 6192

              #7
              Originally posted by Flight Medic View Post
              While installing the SA clamp-on gas block I had to run up to AutoZone and purchase a feeler gauge set because the instructions called for a .025 gap to line up the holes.


              The rest of the stuff was pretty straightforward. The only other issue I had was with the Lancer picatinny rail section.


              I wanted to use the forward-most slot for the rail for the bipod, but it came into contact with the bottom of the gas block, so I had to move the rail back one slot...although I dont think it looks too weird set further back.


              So, theres growler's requested "play-by-play" and a pic of the finished product. Once I test-fire it, and make sure it doesnt blow-up, I will mount the optic and see if Ive achieved my goal of a precision AR build.
              Good stuff OP.

              Lil tip for you before you go shoot it. Lub the bcg down soaking wet with your choice of gun oil and hand cycle it bout 100 times.

              Then clean everything good and repeat anouther 100 times, clean and lightly lub and then go shoot it.

              You would be surprised at the amount of less headaches if you break in the parts by hand first before ever shooting a live round.

              Comment

              • Growler
                Warrior
                • Jan 2019
                • 163

                #8
                These are great photos, and a cool build story. Thanks for taking the time to do this.

                Hope to see some range reports when ready. A top-tier barrel like this Lilja shouldn’t take too many firings to settle down. Great work on a gorgeous build!

                Comment

                • CJW
                  Chieftain
                  • Jun 2019
                  • 1356

                  #9
                  Great thread Flt Medic, pictures are great.

                  A5Blaster, thanks for your assembly tips, I will follow your advice on next AR.

                  C

                  Comment

                  • Flight Medic
                    Bloodstained
                    • Sep 2019
                    • 55

                    #10
                    Originally posted by A5BLASTER View Post
                    Good stuff OP.

                    Lil tip for you before you go shoot it. Lub the bcg down soaking wet with your choice of gun oil and hand cycle it bout 100 times.

                    Then clean everything good and repeat anouther 100 times, clean and lightly lub and then go shoot it.
                    I shall do so. Thanks for the tip (which is the same exact thing the prostitute said to the leper post coitum ).

                    Comment

                    • A5BLASTER
                      Chieftain
                      • Mar 2015
                      • 6192

                      #11
                      Originally posted by Flight Medic View Post
                      I shall do so. Thanks for the tip (which is the same exact thing the prostitute said to the leper post coitum ).
                      She also said it's been a business doing pleasure with you lmao.

                      Comment

                      • Lastrites
                        Warrior
                        • Apr 2017
                        • 678

                        #12
                        FM, don't wait to tell how you like the handguard, I'm looking at the LCH or a Coda Evolution, trying to decide which route to take but I want to do a carbon fiber something to go along with my 14.5" Lilja that Rebby was kind enough to sell me!
                        Last edited by Lastrites; 10-21-2019, 10:59 PM.

                        Comment

                        • Flight Medic
                          Bloodstained
                          • Sep 2019
                          • 55

                          #13
                          Originally posted by Lastrites View Post
                          FM, don't wait to tell how you like the handguard, <snip>
                          From a purely aesthetic perspective, I love it. I think its gonna look amazing once the Vortex optic is mounted. I will report how it performs, which obviously is the most important aspect of a handguard, but I'm really impressed with the fit-n-finish of this product...its SOLID!! I mean, ZERO flex. I didnt expect that. Now I know why they wrap barrels in CF.


                          The part I have my doubts about is the Magpul bipod. Its solid as well, very little slop or play. But its just so lightweight compared to my Atlas it feels cheap. Then again, at less than 1/3 the price of my Atlas, it WAS cheap. LOL


                          Perhaps it will surprise me.

                          Comment

                          • danm
                            Warrior
                            • Aug 2014
                            • 498

                            #14
                            Nice documentary and SWEET build! I think the Magpul bi-pod will surprise you, I have one on my 18" Gr DMR-ish build and it does the job.... Especially for the weight

                            Comment

                            • Lastrites
                              Warrior
                              • Apr 2017
                              • 678

                              #15
                              FM thank your for your perspective, my simple re-barrel seems to have turned the tide into a whole new build...it never ends.

                              Comment

                              Working...
                              X