Hunting knives and related projects

Collapse
X
 
  • Filter
  • Time
  • Show
Clear All
new posts
  • Von Gruff
    Chieftain
    • Apr 2012
    • 1078

    So first job on the stock was to lay out the pattern


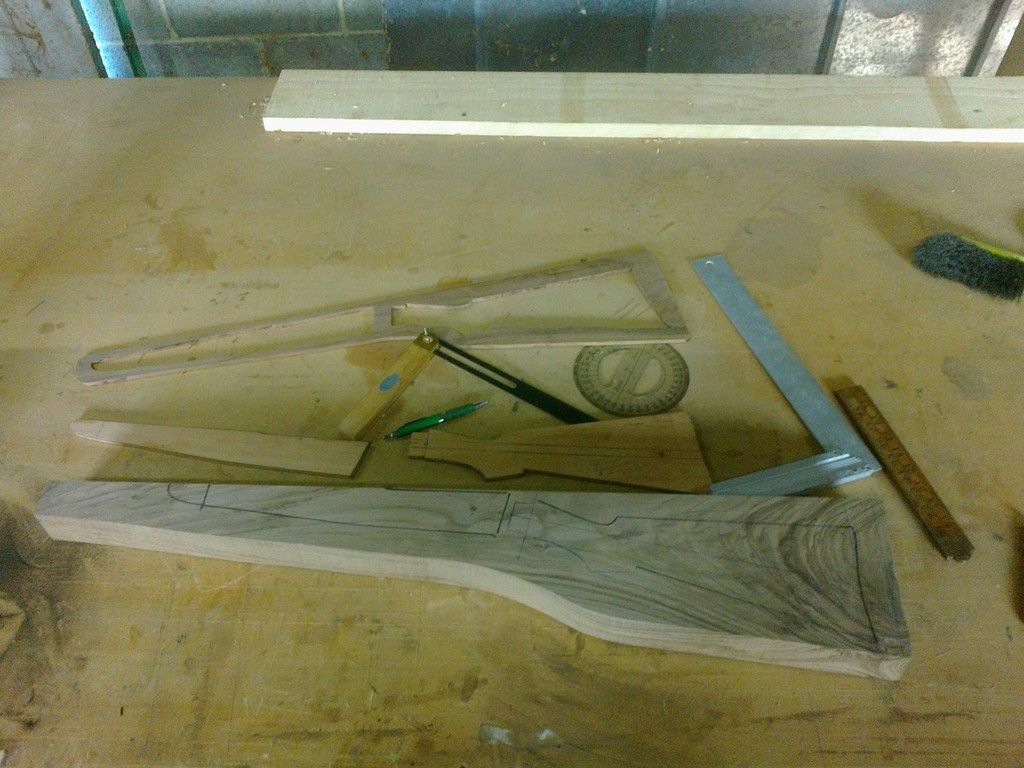
    As an aside Bill required a 14 in L O P and if a line is drawn down the rear of the wrist socket and a measurement is made from the centre down the line for 2 inches, a 1/2 forward of this line is the face of the trigger so from there to a line through the centre of the stock bolt hole has 14 inches marked then the L O P should be as requested. At the same time when Bills preference for pitch was asked for, the same 2 degrees negative pitch that I did my own rifle was decided on. Our style of shooting and chest structure will dictate this factor in the design


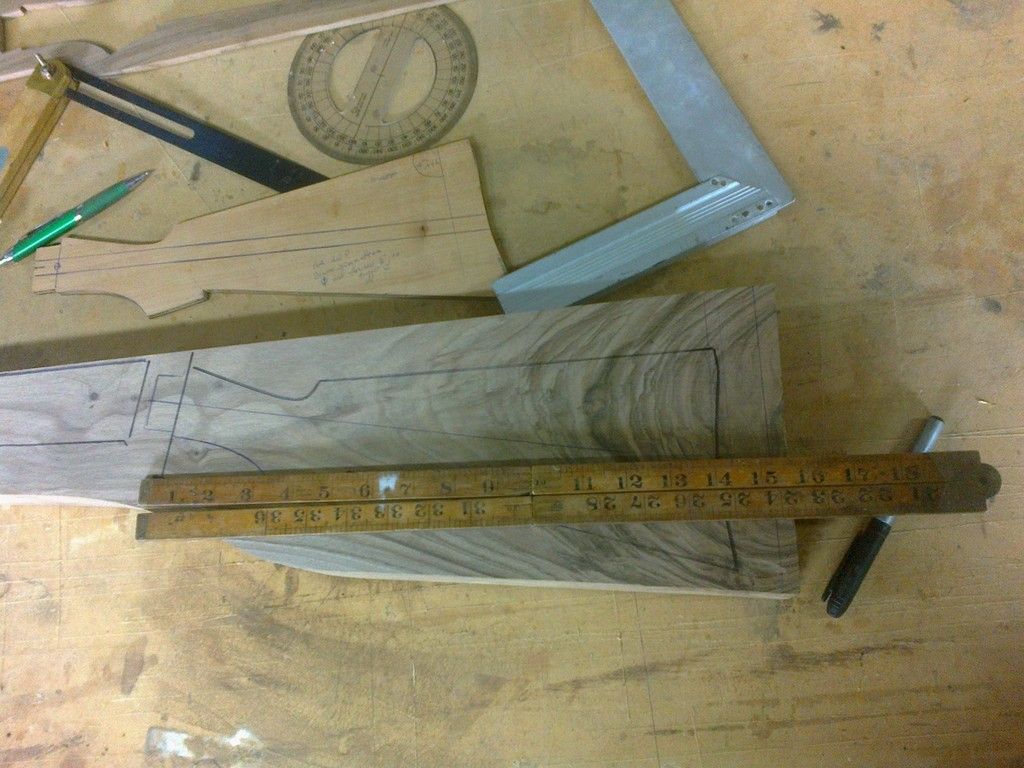
    Something I have found to be advantagous is to (if necesary) plane the top edge of the blank so that the pattern can be laid out with the top edge of the blank coinciding with the top line of the forstock and then the angles can be more easily marked in and using the draw saw set to that angle the face of the draw against the socket can be made accurate. The same angle is used for the face of the socket nose
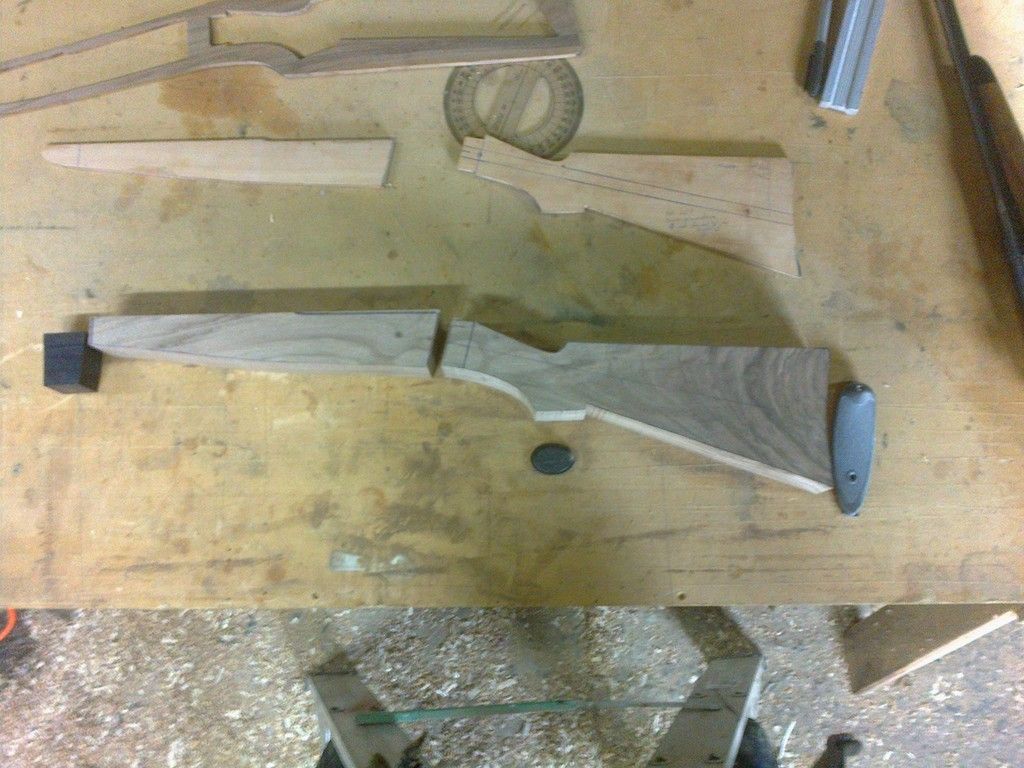
    So with the pattern cut out and the grip cap, forend tip and the checkered buttplate all in order it was time to leave things for the day.

    http://www.vongruffknives.com/

    sigpic Von Gruff


    Grendel-Max

    Exodus 20:1-17
    Acts 4:10-12

    Comment

    • Von Gruff
      Chieftain
      • Apr 2012
      • 1078

      I will say up front that the three most helpfull tools in this process are the air hose, a strong directable light and an optivisor

      The first thing this morning was to sort out the wrist socket and as there is the anchor point and recess for the lobbing sight that needed the first attention.


      I don't like to weld on the action so the outer edge of the screw hole was very slightly opened up, a screw shaft was threaded in with Devcon steel to make sure it was a tight and immovable fit and later this afternoon as it sets the outer edges of the shaft can be peened into the countersink.

      A piece of steel was cut to be fitted into the recess.


      After rough shaping to get to this stage it was down to smoking it in with needle files and after a couple of hours it is fitted so it is also devconed into place and will be attended to after it is set.
      http://www.vongruffknives.com/

      sigpic Von Gruff


      Grendel-Max

      Exodus 20:1-17
      Acts 4:10-12

      Comment

      • Von Gruff
        Chieftain
        • Apr 2012
        • 1078

        It has been a reasonably productive day and there was enough day left and with the devcon still waiting to harden off I turned to the butt stock and got the bolt hole drilled. I have done a few of these now for both the Lee Enfields and the Martini's so have a few guides and so forth that I keep with the special drills for the job.
        With a guide to run the drill against and a fixed and a sliding guide for the long drill bit, it is a reasonably straight forward process.


        When the sliding drill guide gets up to the fixed one it can be set aside as the fixed one and the actual hole through the stock both act to guide the bit at this stage. The drill bit is a simple piece of 12mm mild steel rod that I had a guy mill to the half way point for a couple of inches and filed a couple of cutting edges with a bias toward the leading edge


        This is what you want to see at the end of the drilling process, or what you should see.


        The counter bore is then done for the bolt head and for the bolt snout in the socket.
        With the bolt laying where it will fit to there is the various bits needed to get it there with the headless bolt I use to fit the stock into the socket

        http://www.vongruffknives.com/

        sigpic Von Gruff


        Grendel-Max

        Exodus 20:1-17
        Acts 4:10-12

        Comment

        • Von Gruff
          Chieftain
          • Apr 2012
          • 1078

          Next I checked that my action pattern fitted into the stock the barrelled action came from.


          Then gauged a centre line and set the pattern. I know that the pattern needs to be flush with the rear top edge of the socket "draw" face and to make sure I get it tight I set the pattern a few thou forward at this point so I can do a sand fit on the face later.


          With the action marked in the next step is to get the depth down to the action flat and while I don't need to set it up like this to get the measurement I did to get the pic


          With this stage reached it was time to set the forend tip so everything that needs to be glued or devconed will be ready for tomorrow.
          I measure the barrel at the point it intersects the tip join and mark the shape onto the face so I can set the three brass dowels to make sure they are going to be centered in the remaining wood after the barrel channel is carved in and the outer shape is done. Looking for maximum strength. Some more devon and it is ready for cramping.


          So with it cramped up I have a heat lamp close enough to make sure the temp dose not drop and effect the setting strength of the epoxy
          http://www.vongruffknives.com/

          sigpic Von Gruff


          Grendel-Max

          Exodus 20:1-17
          Acts 4:10-12

          Comment

          • Von Gruff
            Chieftain
            • Apr 2012
            • 1078


            That will do for the day. Tomorrow will see some filing on the socket to make it a bit more sleek in the wrist.
            http://www.vongruffknives.com/

            sigpic Von Gruff


            Grendel-Max

            Exodus 20:1-17
            Acts 4:10-12

            Comment

            • Von Gruff
              Chieftain
              • Apr 2012
              • 1078

              With the steel filler plate and screw thread having the epoxy hardened off It was time to put the files and cutting paper to work.


              And on the bolt side, being carefull to stay away from the wrist markings


              http://www.vongruffknives.com/

              sigpic Von Gruff


              Grendel-Max

              Exodus 20:1-17
              Acts 4:10-12

              Comment

              • Von Gruff
                Chieftain
                • Apr 2012
                • 1078

                This is a side by side comparrison of an untouched and a fully filed wrist on what will be my 400 on the right and a 375 on the left. I will cover these two and my 303 briefly later


                http://www.vongruffknives.com/

                sigpic Von Gruff


                Grendel-Max

                Exodus 20:1-17
                Acts 4:10-12

                Comment

                • Von Gruff
                  Chieftain
                  • Apr 2012
                  • 1078

                  Marking out the confines of the mag well


                  and drilling a few holes. The do not have to go right through


                  And a bit of a clean up

                  http://www.vongruffknives.com/

                  sigpic Von Gruff


                  Grendel-Max

                  Exodus 20:1-17
                  Acts 4:10-12

                  Comment

                  • Von Gruff
                    Chieftain
                    • Apr 2012
                    • 1078

                    Turning the forestock over I can cut down inside the action outline I marked in the other day. I like the hacksaw for this as it leaves a nice fine cut


                    The bulk can be removed with a chisel


                    Then the old grannies tooth gets its foot sharpened. I like the slow methodical removal of wood this tool gives.


                    The good thing about doing it this way is that having the action flat planed in with the hand router I know that when I get the barrelled action smoked down to there it is going to be in the right place with the barrel centreline level with the top of the stockline. I do have enough extra in the stock depth that I take the flat down about 1/32 under depth so I have sanding cleanup on top.

                    http://www.vongruffknives.com/

                    sigpic Von Gruff


                    Grendel-Max

                    Exodus 20:1-17
                    Acts 4:10-12

                    Comment

                    • Von Gruff
                      Chieftain
                      • Apr 2012
                      • 1078

                      With the action flats in the right depth the forestock can be turned over and the rearward measurement taken for the trigger lever clearance and the unwanted removed


                      At this stage I run the top side onto the planer to get allow easier inetting of the action.


                      The smoking and fitting the action can start and a file that has had the teeth ground off. heated, bent and sharpened makes a dandy scraper for these areas


                      To get to this depth the start of the barrel channel has to be chiselled in but until the decision has been made as to whether the present long tom barrel is going to be used or a replacement #1 Mk lll barrel is going to be inlet for the channel will not be take any further as the difference in profile would be very noticable.


                      (When the rifle was finished using the long tom barrel it was eventually bored to 375 for the 375x2 1/2 Nitro Express cartridge)
                      http://www.vongruffknives.com/

                      sigpic Von Gruff


                      Grendel-Max

                      Exodus 20:1-17
                      Acts 4:10-12

                      Comment

                      • Von Gruff
                        Chieftain
                        • Apr 2012
                        • 1078

                        I thought I would fit the butt into the socket while I waited for a decision on the barrel so the first thing was to get the depth of the socket


                        Setting the marking guage with the caliper, the socket depth can be marked onto the stock and with the headless bolt screwed in and slipped onto the stock hole I can mark around the outside of the action.


                        Again I use the hacksaw to cut in to a judged depth around the perimeter of what will be the shoulder and freehand an approximate socket wall thickness inside that line and start the roughing out of the socket stub.


                        By smoking the socket shoulder I can "find" the entrance into the socket and then it is just smoking and filing or scraping the stub as it gradually gets fitted into a close fit.


                        By setting the butt into the vice vertically a small hardwood block can be placed against the action side of the socket and given a tap (or two) which helps to define where wood needs removing

                        http://www.vongruffknives.com/

                        sigpic Von Gruff


                        Grendel-Max

                        Exodus 20:1-17
                        Acts 4:10-12

                        Comment

                        • Von Gruff
                          Chieftain
                          • Apr 2012
                          • 1078

                          Once I get down to where there is shoulder contact, files are used to gradually get a full shoulder contact around the socket edge and with smoke into the socket I can make sure there is contact on booth the shoulder and stub nose.


                          The headed bolt is used to pull everything together and when ther is full contact on the shoulder right arround the socket and on the nose the job is done.

                          http://www.vongruffknives.com/

                          sigpic Von Gruff


                          Grendel-Max

                          Exodus 20:1-17
                          Acts 4:10-12

                          Comment

                          • Von Gruff
                            Chieftain
                            • Apr 2012
                            • 1078

                            There had been a decision made as the barrel with the current Long Lee barrel getting the nod for use after a few shots showed it still had life left on it. On the strength of that a lfew hours with the smoker had it all down to just over half way which was enough for the day.


                            A few hours in the shed today on the barrelled action inlet and by smoking I can remove the bits that touch. It is important at this stage no to take the very edge of the channel as the round of the barrel and action will come to almost vertical as it get to depth and while there will be smoke mark along the top edge of the channel it is important to reconcile that with the need for a tight fit as the metalwork comes down to depth. Bedding onto wood is always preferable.


                            A selection of tool for the inlet

                            http://www.vongruffknives.com/

                            sigpic Von Gruff


                            Grendel-Max

                            Exodus 20:1-17
                            Acts 4:10-12

                            Comment

                            • Von Gruff
                              Chieftain
                              • Apr 2012
                              • 1078

                              most important is the smoker which in my case is simply the wick mechanism from a kero lantern that I have removed and set into a suitable tin. A couple of tabs on the tin hold things together and the best thing is that it takes all of a minute to return it to the lantern if light is needed.


                              In use it works extremely well and is easily regulated

                              http://www.vongruffknives.com/

                              sigpic Von Gruff


                              Grendel-Max

                              Exodus 20:1-17
                              Acts 4:10-12

                              Comment

                              • Von Gruff
                                Chieftain
                                • Apr 2012
                                • 1078

                                I made some handy tools to help with the barrel inlet from pieces of old barrel. I had been using the part barrels as push scrapers but sometimes the way the grain lies a pull scraper is better.
                                A 3/4 in length was cut from the three relevant sizes.


                                The barrel is drilled (if needs dictate) fro the 8" x 1/4" bolts


                                One nut is ground to make a back nut that is as small as will still work and the head is cut from the bolt.


                                And the finished tool. The piece of barrel can be removed and sharpened but they can be turned (6oclock to 12 oclock) and reversed end for end so there are four cutting edges that can be used before they need a touch up on the oilstone. Having the three different sizes makes it easy to change tools to keep the channel to the right shape and with a bit of sandpaper round the longer barrel bits is te way to finish off and smooth the channel.

                                http://www.vongruffknives.com/

                                sigpic Von Gruff


                                Grendel-Max

                                Exodus 20:1-17
                                Acts 4:10-12

                                Comment

                                Working...
                                X